See links to jump to specific topics below:
Creating a Quote
- Setting Up Rooms
- Adding Furnishing Details and Accessories
- Extras
- Managing Pricing
- Finalising The Quote
- Editing Quote Details
Tips and Best Practices for success:
- View Price List
- Save Function
- Viewing Options
- Action Button
- Editing Dates
- Adding Client Notes
- Handling Lost Quotes
Quote Creation
To start creating a new quote, simply click on the 'create new quote' icon located on the dashboard's top right corner. This will prompt a pop-up where you can input your customer details. Remember, all fields are mandatory except for client notes. Once you have filled in the necessary information, click on 'begin quote' to proceed.


Room Creation
To start creating your quote, click on 'New Room' located either in the center of the screen or at the bottom right corner.

To add a room, you can either choose the name from the dropdown box or type it in. If the room name is already listed, it will be automatically selected. If not, you can proceed by entering a custom room name.
In each room, you have the flexibility to include as many windows as needed. By default, window names will be W1, W2, and so on, but you have the option to customize these names. Once you have set up the room and windows, proceed to the next step to add your chosen furnishings.

After setting up the room and windows, you will be prompted to choose the type of furnishing from a dropdown menu. By default, this will be set to single roller blinds. You can then add more furnishings and specify which window in the room they should be assigned to. Once you have selected the furnishings, simply click on the 'submit' button to proceed.

Continue following the steps outlined above until you have included all the necessary rooms, windows, and furnishings in your quote.
Furnishing Details and Accessories
After setting up the rooms and adding furnishings to our quote, it's time to provide the specific details for each furnishing.
Each type of furnishing will have its own set of required fields. For more in-depth information on each product, refer to the Knowledge base where you can find detailed articles on every item.
Once you've filled in the necessary information on this page, simply click on 'Edit Accessories' to switch to the next page and complete the fields for accessories as well.

There are two viewing options available: 'Room' and 'Product'. These options help organize products based on their assigned rooms or group them by product types, respectively.
Choose 'Select all' to make changes to all items within the window or product grouping.
Extras
Extras refer to additional options that need to be selected to provide an accurate quote. This includes choices like removal and disposal services.
These selections may not be needed for every quote, as they are not common. However, make sure to toggle them as necessary.
Managing Pricing
To adjust the pricing for your project, simply click on the 'manage pricing' option located at the top of your screen. This action will bring up the 'Manage Pricing' modal for you to make any necessary adjustments.

Finalising The Quote
After making all your choices, click on 'continue' at the bottom right corner. If any necessary fields are left blank, a red banner will indicate the missing information. Once you proceed, you will have two options: 'Save as Quoted' or 'Save as Accepted'.


Usually, quotes are saved as "quoted" to be sent to the customer for review. Once the customer is ready to move forward, the quote can then be saved as "accepted."
Save As Quoted
- Download a pdf of the quote to send to your customer
- Set Follow up Dates and the quote expiry
- Progresses the quote to the 'Quoted' stage in the dashboard
Save As Accepted
- Job has been won and customer will be proceeding
- Skips the Quoted stage
Editing Quote Details
On the review page, there are three buttons to be aware of.
From the 'Edit Details' modal, you can make changes to the client's information. This is also where you can add private notes for your own reference that the customer will not be able to view.

The 'Add Comment' option allows you to include a note that will be visible to the client regarding the job.

'Manage Pricing' provides a summary of quote pricing. If you need to make changes, simply create a new version of the quote to update the pricing details.

Tips and Tricks
View Price List
To access the pricing grid for a product within a quote, simply click on the three dots, then select 'view price list'. A pop-up window will then display the detailed price list for that specific product.

Save
It is advisable to save the quote whenever you make changes. You can tell if the quote is up to date by the colour of the save icon - white means it's current with all changes, while green with a red badge indicates there are unsaved changes.

View Options
Within the application, users have the flexibility to switch between two viewing options: Rooms and Products. The Rooms view organizes products based on the room they are designated for, while the Products view groups together products of similar types.

Action Button
This feature provides access to tools to help manage your quote effectively. You can access this menu by locating the button in the bottom left corner of your screen.

Edit Dates
Setting the quote expiry and follow-up dates helps you stay organized. The follow-up date serves as a reminder to check in with the customer, while the expiry date can be used as a sales tool to encourage the customer to accept the quote. 
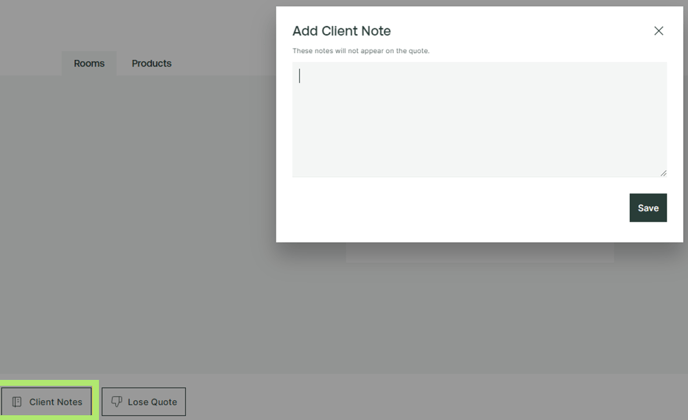
Client Notes
These are private notes for internal use and are not visible to the customer.
Lose Quotes
If a customer is unlikely to proceed with the quote, you can mark it as "lost" at any point during the quoting process. Lost quotes are easily reopened whenever needed, providing flexibility in managing your quotes effectively.
